
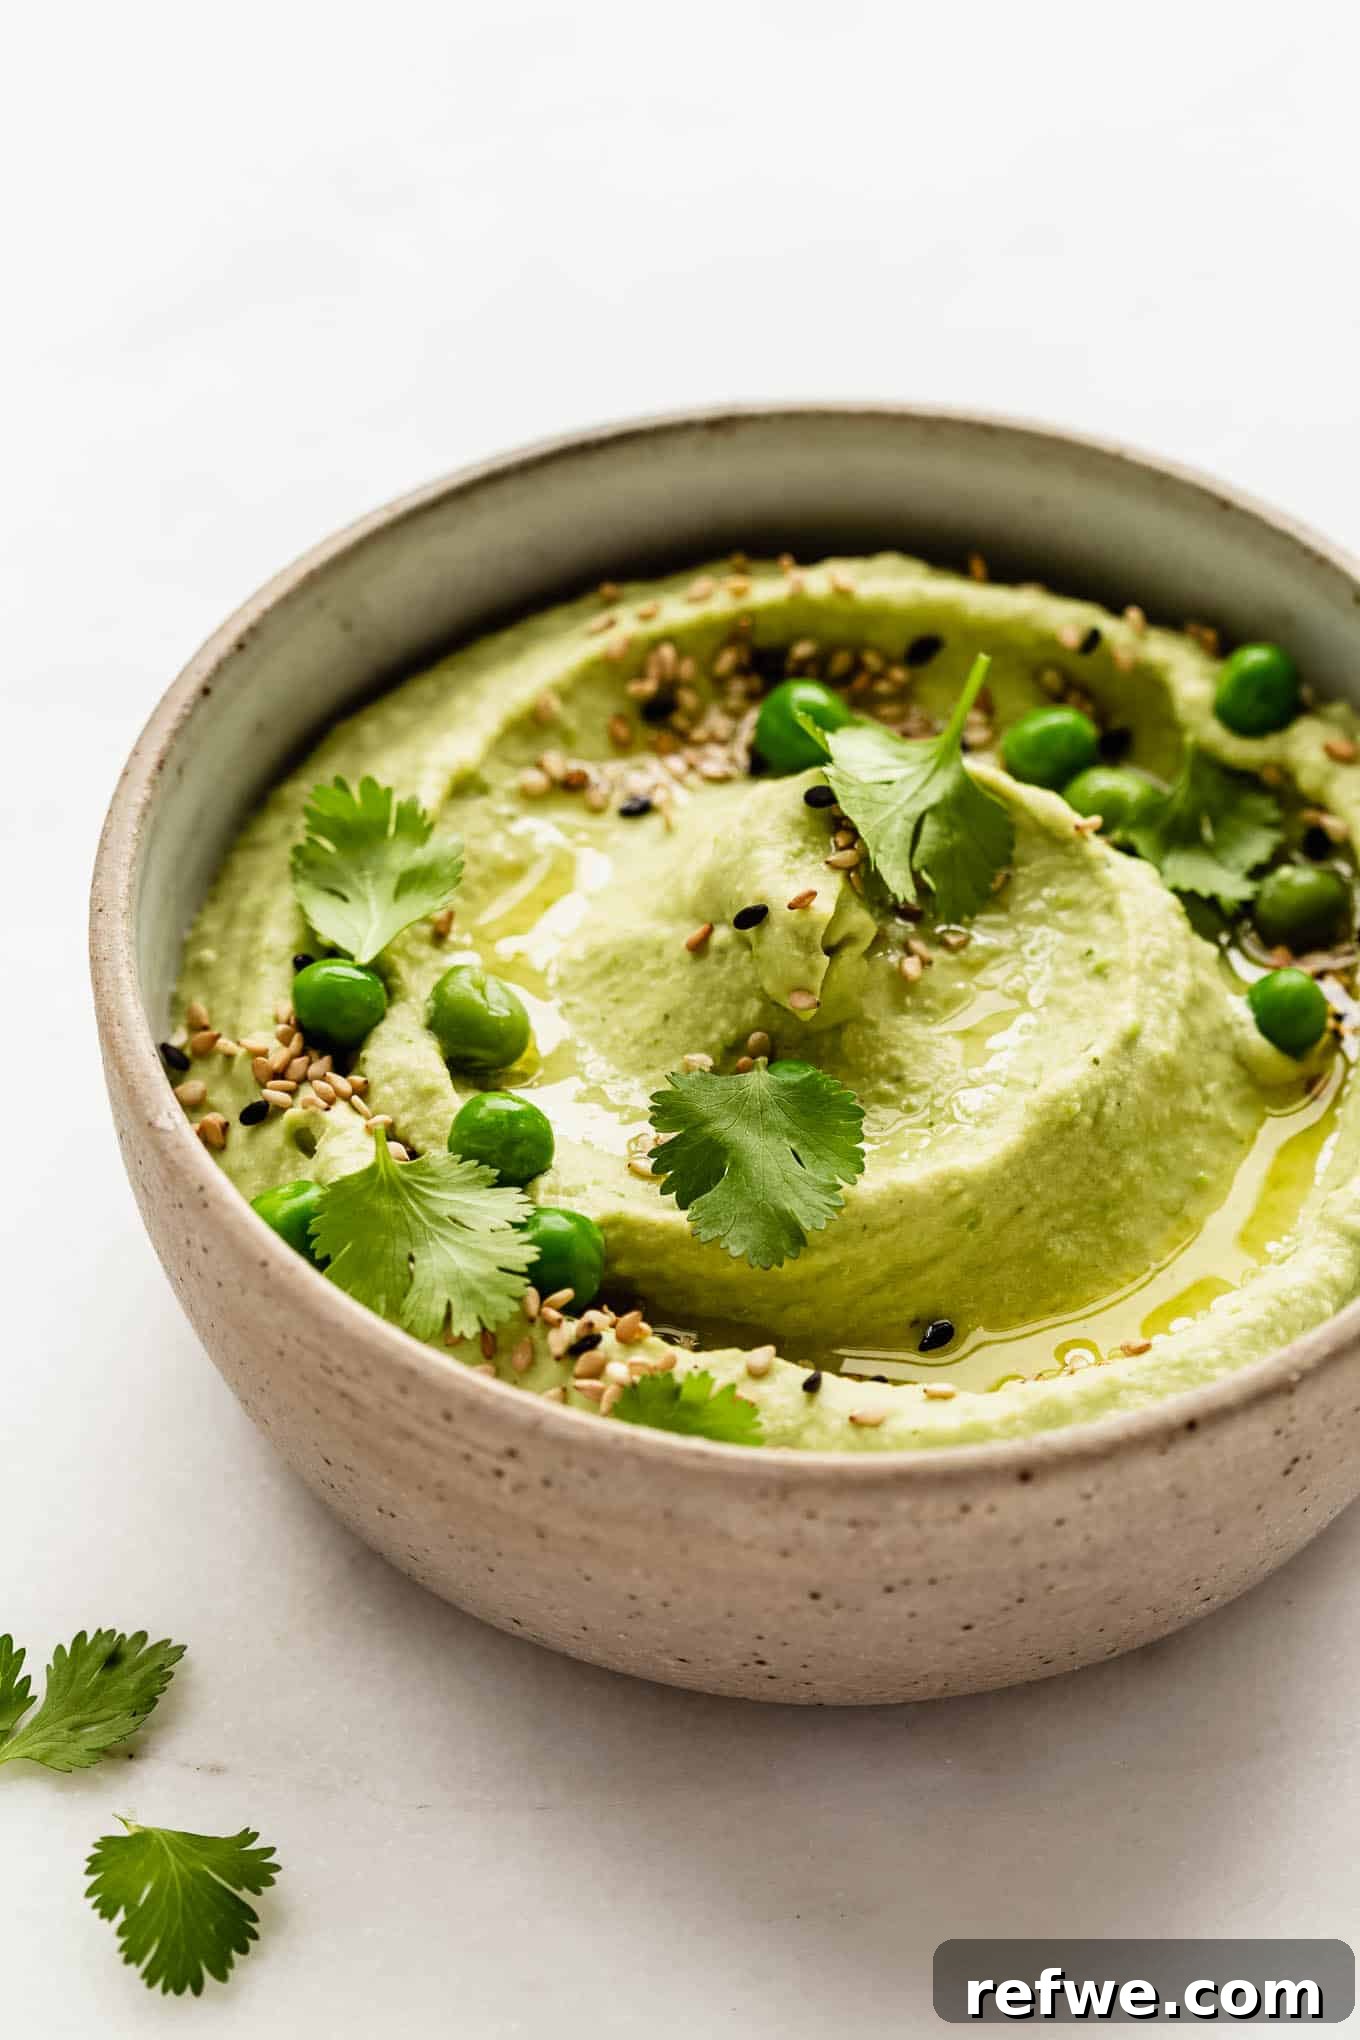
Discover a vibrant and incredibly fresh twist on the beloved classic dip with our **Green Pea Hummus** recipe! This delightful creation takes traditional hummus to a new level, infusing it with the sweet, earthy essence of green peas and aromatic herbs. The result is a light, airy, and beautifully verdant dip that is perfect for any occasion, especially during the spring and summer months. Naturally gluten-free and vegan, this recipe is not just delicious but also incredibly wholesome, making it an ideal choice for healthy snacking, entertaining guests, or adding a burst of fresh flavor to your meals.
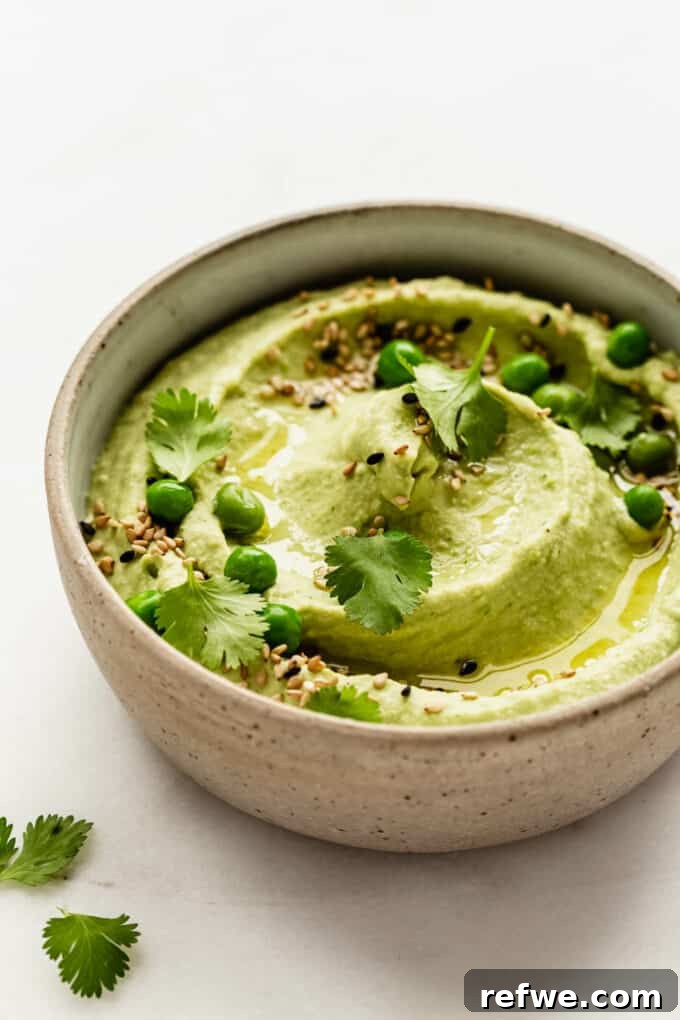
Hummus Made with Green Peas: A Spring & Summer Delight
If you’re already a fan of the creamy, nutty goodness of traditional hummus, prepare to be captivated by this enchanting variation. Our green pea hummus recipe introduces a delightful seasonal flair, transforming the familiar dip into something truly special. The addition of fresh or frozen green peas imparts a subtle sweetness and an undeniable earthy undertone, perfectly balancing the richness of the tahini and the tang of fresh lemon. Beyond its exquisite flavor, the peas lend a stunning light green hue, making it a visually appealing centerpiece for any spread.
This pea-infused hummus is more than just a dip; it’s a versatile culinary staple. Whether you’re hosting a lively summer barbecue, enjoying a cozy dinner with friends, or simply seeking a nutritious and effortless snack to keep in your fridge, this recipe fits the bill. Its refreshing taste and smooth texture make it an excellent accompaniment to a variety of dishes, ensuring it will quickly become a favorite in your healthy recipe repertoire.
Why You’ll Adore This Vibrant Green Pea Hummus Recipe
- Fresh and Vibrant Flavor Profile. If you’re tired of the same old plain hummus, this green pea version offers a delightful change of pace. It’s a fun and exciting twist on the classic, bursting with the fresh flavors of spring and summer. The sweetness of the peas, combined with aromatic herbs and zesty lemon, creates a wonderfully invigorating taste that will awaken your palate. It’s perfect for breaking out of your routine and adding a pop of freshness to your snack time or meal.
- Effortless & Quick (Ready in 20 minutes). Don’t let the idea of homemade hummus intimidate you. This recipe is surprisingly quick and simple to prepare, requiring just 20 minutes from start to finish. With minimal effort and a few basic ingredients, you can whip up a batch of creamy, flavorful hummus that far surpasses anything you’d find in a store. It’s the ideal solution for busy weekdays or impromptu gatherings when you need a healthy and impressive appetizer in a flash.
- Superior to Store-Bought Alternatives. Many commercial hummus brands often contain undesirable ingredients such as canola oil, excessive preservatives, and artificial flavors. Once you experience the unparalleled taste and texture of this homemade green pea hummus, crafted with fresh, wholesome ingredients, you’ll find yourself reaching for store-bought versions far less often. You have complete control over the quality and type of oil used, the amount of salt, and can avoid any unnecessary additives, resulting in a healthier and undeniably more delicious product.
Essential Ingredients for Your Green Pea Hummus
Crafting the perfect green pea hummus begins with selecting fresh, quality ingredients. Here’s a closer look at what you’ll need and why each component is essential for achieving that delightful flavor and creamy texture:
- Chickpeas: The backbone of any good hummus! You can use either canned chickpeas for convenience or dried chickpeas if you prefer to cook them from scratch. If using dried, ensure they are cooked until very tender according to package directions. Chickpeas provide the creamy base, essential fiber, and plant-based protein that makes hummus so satisfying and healthy.
- Green Peas: The star of this unique hummus! Both fresh and frozen green peas work wonderfully. If it’s peak season, opt for fresh peas to enjoy their peak sweetness and vibrant flavor. Frozen peas are a fantastic, readily available alternative that maintain excellent taste and nutritional value. They infuse the hummus with a beautiful light green color and a subtly sweet, earthy taste.
- Cilantro: This fresh herb adds a wonderful, bright, and slightly citrusy flavor that complements the peas beautifully. If you’re not a fan of cilantro, don’t worry! You can easily omit it or substitute it with 2 tablespoons of finely chopped fresh mint, parsley, or even basil for a different aromatic twist.
- Garlic: Fresh garlic is non-negotiable for that essential pungent kick. One clove is usually sufficient to impart a distinct flavor without overpowering the delicate pea notes. For a milder taste, you can roast the garlic beforehand.
- Tahini: A crucial ingredient that provides the signature nutty flavor and rich, velvety texture of hummus. Tahini is a paste made from ground sesame seeds, and its quality significantly impacts the final result. Look for a smooth, pourable tahini for the creamiest hummus.
- Olive Oil: High-quality extra virgin olive oil not only adds richness and depth of flavor but also contributes healthy monounsaturated fats. It helps to emulsify the hummus, contributing to its smooth consistency and luxurious mouthfeel.
- Lemon Juice: Freshly squeezed lemon juice is vital for balancing the flavors. Its bright acidity cuts through the richness of the tahini and olive oil, adding a zesty freshness that truly makes the hummus sing. Always opt for fresh lemon juice over bottled for the best results.
- Salt: A fundamental seasoning that enhances all the other flavors. Start with the recommended amount and adjust to taste, as personal preferences for salt can vary.
- Very Cold Water: This is often considered the “secret ingredient” for achieving exceptionally smooth and creamy hummus. Slowly adding very cold (even iced) water to the food processor while it’s running helps to whip the mixture into a light, airy, and incredibly silky consistency, emulsifying the tahini and olive oil perfectly.
Step-by-Step Guide to Crafting Creamy Pea Hummus
Making homemade green pea hummus is a straightforward process that yields incredibly delicious results. Follow these simple steps to create a dip that’s sure to impress:
Preparation Steps:
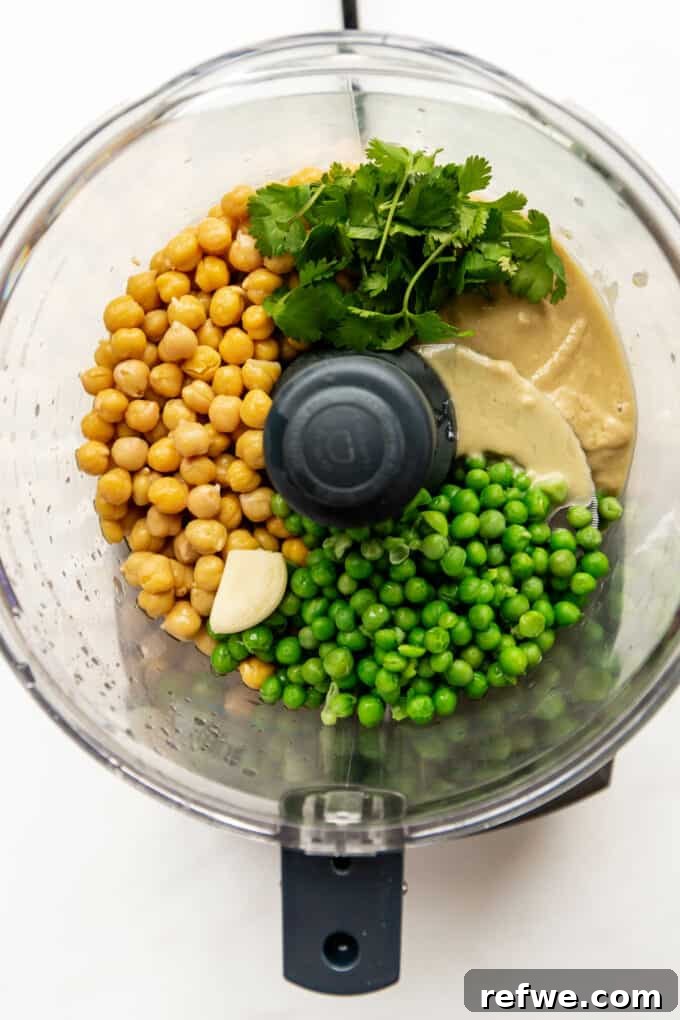
- Prepare Chickpeas and Peas: Begin by draining and thoroughly rinsing your canned chickpeas. For an ultra-smooth hummus, take the extra step of removing the skins from the chickpeas. This can be done by gently rolling them in a clean kitchen towel, which often causes the skins to loosen and come off naturally. Alternatively, you can gently squeeze each chickpea to remove its skin; discard the skins afterward. If using frozen green peas, briefly blanch them in a pot of boiling water for 3-4 minutes until they are tender-crisp, then drain them thoroughly.
Blending for Perfection:
- Combine All Ingredients: Add the prepared chickpeas, blanched green peas, fresh cilantro, garlic, tahini, olive oil, fresh lemon juice, and salt into the bowl of a high-speed food processor or a powerful blender. Ensure all ingredients are nestled in and ready for blending.
- Initial Blend: Process the mixture for approximately one minute. During this initial blend, the ingredients will start to break down and combine. Stop the food processor as needed to scrape down the sides of the bowl with a spatula, ensuring all components are thoroughly incorporated and blending evenly. This prevents dry pockets and promotes a uniform texture.
Achieving Silky Smoothness:
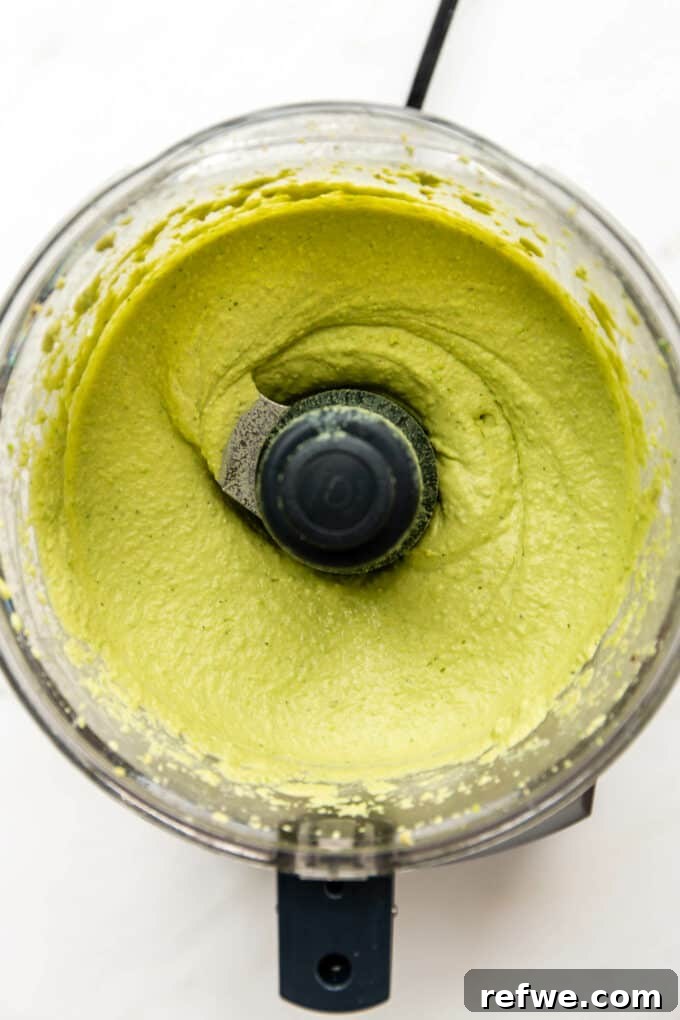
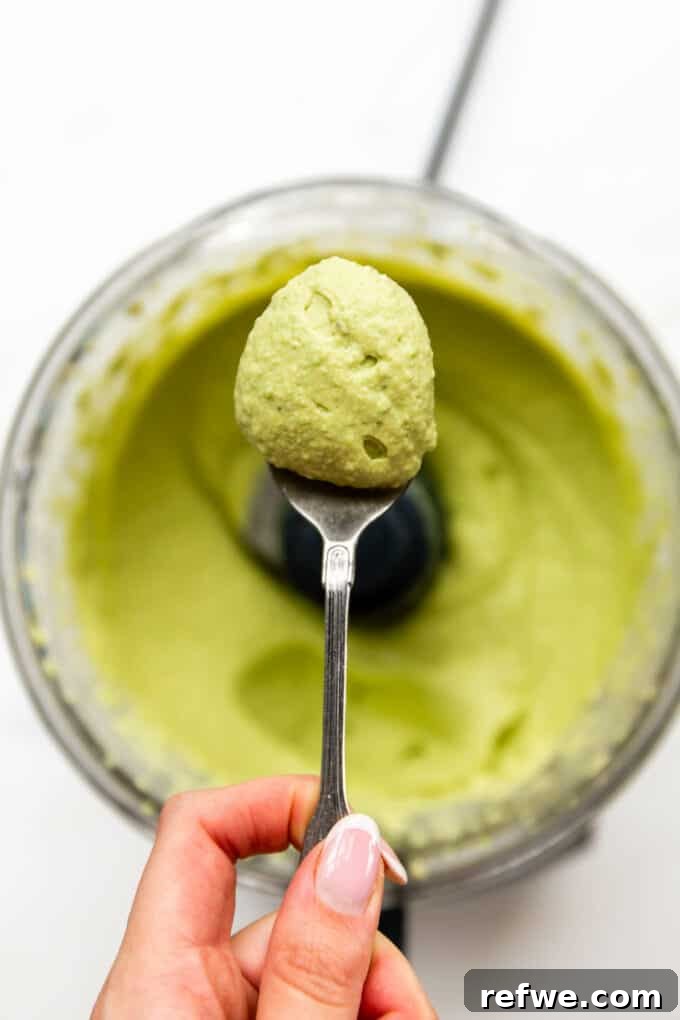
- Slowly Add Cold Water: With the food processor running continuously, slowly drizzle in the very cold water through the feed tube or spout on the top. The cold water is key to achieving a truly creamy, light, and airy hummus. Continue blending for another 1-2 minutes after the water has been added, or until the hummus reaches a wonderfully smooth and silky consistency with no remaining chunks. The blending process helps to whip air into the mixture and fully emulsify the fats.
- Taste and Adjust: Once the hummus is smooth, taste it and adjust the seasoning as necessary. You might want to add a touch more salt, a squeeze of lemon juice for extra brightness, or even a dash more cold water to reach your preferred thickness.
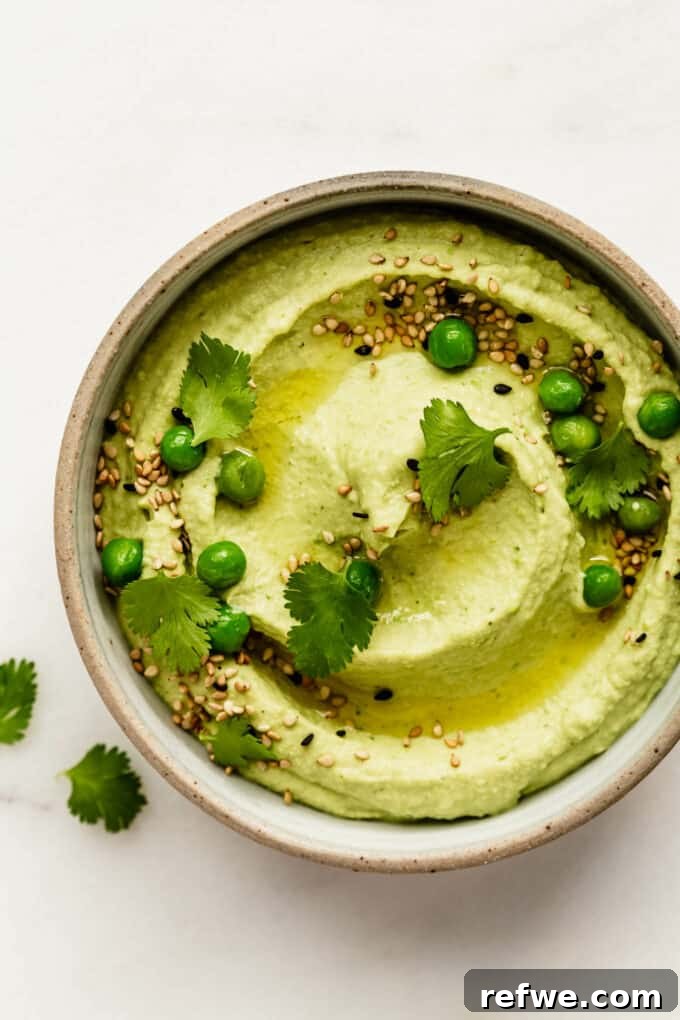
- Serve and Enjoy: Transfer your freshly made green pea hummus to a serving bowl. For an extra touch of elegance and flavor, drizzle a little extra virgin olive oil over the top and garnish with a few whole green peas or a sprinkle of fresh cilantro. Serve immediately, or cover and refrigerate until ready to enjoy.
Creative Ways to Enjoy Your Green Pea Hummus
Hummus is incredibly versatile, and this green pea variation is no exception! While it excels as a simple dip, its fresh flavor and creamy texture make it a fantastic spread or even a sauce. Here are numerous delightful ways you can serve up and savor your homemade green pea hummus:
- Classic Dipping with Crudités: Pair it with an assortment of crisp, fresh vegetables like carrot sticks, cucumber slices, bell pepper strips, cherry tomatoes, radishes, or celery stalks for a refreshing and healthy snack.
- Pita Perfection: Serve alongside warm pita bread, toasted pita chips, or crusty bread for a satisfying appetizer. The subtle sweetness of the peas complements the savory bread perfectly.
- Elevate Your Sandwiches and Wraps: Spread a generous layer of green pea hummus in your favorite sandwiches, wraps, or pitas instead of mayonnaise or other condiments. It adds moisture, flavor, and a healthy boost of protein and fiber. It pairs wonderfully with roasted vegetables, grilled chicken, or fresh greens.
- A Topping for Bowls: Dollop it generously onto a vibrant falafel bowl, a wholesome grain bowl, or a refreshing salad bowl. Its creamy texture and bright flavor will tie all the components together beautifully.
- Toast Topper: Spread it on whole-grain toast or crackers for a quick and nutritious breakfast or snack. Top with avocado, Everything Bagel seasoning, or red pepper flakes for an extra kick.
- Grilled Delights: Serve as a side dip for grilled meats, chicken, or fish. The light and fresh flavor cuts through the richness of grilled dishes.
- Burger & Fry Companion: Use it as a healthier alternative to ketchup or mayo with veggie burgers or sweet potato fries.
- Savory Pancakes/Waffles: Yes, really! Spread a thin layer on savory pancakes or waffles, then top with roasted vegetables and a sprinkle of fresh herbs for a unique brunch experience.
- As a Pasta Sauce Base: Thin it out slightly with a little extra water or vegetable broth to create a light and creamy pasta sauce, especially delicious with spring vegetables like asparagus and cherry tomatoes.
Storing Your Homemade Green Pea Hummus
To keep your delicious green pea hummus fresh and flavorful, proper storage is key. Transfer the hummus to an airtight container and store it in the **fridge** for up to **1 week**. To prevent the surface from drying out and oxidizing (which can cause discoloration), you can press a piece of plastic wrap directly onto the surface of the hummus before sealing the container, or pour a thin layer of olive oil over the top. This creates a protective barrier that helps maintain its vibrant color and fresh taste.
Pro Tips for Crafting the Best Green Pea Hummus
Elevate your homemade green pea hummus from great to absolutely extraordinary with these expert tips:
- Achieve Silky Smooth Texture: Remove Chickpea Skins. This extra step, while a bit tedious, is 100% worth the effort for the ultimate creamy hummus. Removing the skins from the chickpeas eliminates any grainy texture, resulting in an incredibly smooth and luxurious dip. Simply rub drained and rinsed chickpeas vigorously between your hands or in a clean kitchen towel, or gently squeeze each chickpea to release its skin.
- Embrace Seasonal Freshness: Opt for Fresh Peas. If green peas are in season during the summer months and you can find them at your local grocery store or farmer’s market, definitely use them! Fresh peas offer a sweeter, more vibrant flavor that truly shines in this hummus, making an already delicious dip even more exceptional.
- Customize with Your Favorite Herbs and Spices. Don’t be afraid to experiment with the flavor profile! While cilantro is fantastic, you can add other fresh herbs like mint, dill, or chives for a different aromatic touch. For spices, consider a pinch of ground cumin for earthiness, a dash of smoked paprika for warmth, or a tiny pinch of red pepper flakes if you enjoy a subtle heat. Sumac can also add a delightful tangy note.
- Quality Ingredients Matter. The better your ingredients, the better your hummus will taste. Invest in a good quality tahini that is smooth and pourable, and use a high-quality extra virgin olive oil for the best flavor and healthy fats. Fresh lemons and garlic also make a significant difference.
- Adjust Consistency to Your Liking. The amount of cold water you add can be adjusted based on your desired consistency. If you prefer a thicker, denser hummus, use less water. For a lighter, airier, and more spreadable dip, add more water, a tablespoon at a time, until you reach your perfect texture. Remember to add it slowly while the food processor is running.
Green Pea Hummus: Frequently Asked Questions (FAQ)
While you technically can make hummus without tahini, it’s a core ingredient that contributes significantly to hummus’s distinctive nutty flavor and incredibly creamy texture. Omitting it will result in a dip that is not as rich, smooth, or authentic in taste. If you need to avoid tahini due to allergies or preference, I recommend adding an additional 2-3 tablespoons of olive oil or a tablespoon of a mild nut butter (like cashew butter) to compensate for some of the lost richness and creaminess, though the flavor profile will certainly shift.
Yes, it’s possible to create a “pea dip” without chickpeas if you prefer a lighter, more pea-forward flavor profile. If you choose to omit the chickpeas, you will need to add an additional 2 cups of green peas to the recipe to maintain sufficient volume and a thick consistency. Keep in mind that using only peas will significantly change the final taste and texture; it will be lighter, greener, and may lack the classic robust body that chickpeas provide in traditional hummus.
Absolutely! Green pea hummus freezes quite well. To freeze, transfer the hummus into a freezer-safe, airtight container. If possible, leave about half an inch of headspace to allow for expansion. You can also press a piece of plastic wrap directly onto the surface of the hummus before sealing to prevent freezer burn and oxidation. It can be frozen for up to 2 months. To defrost, simply place the container in the refrigerator overnight, or let it thaw on the countertop for a few hours. Stir well before serving to restore its creamy texture, and you might need to add a touch more olive oil or lemon juice if it seems a bit dry.
Yes, green pea hummus is incredibly healthy! It’s packed with nutrients from its core ingredients. Chickpeas are an excellent source of plant-based protein and dietary fiber, which aids digestion and promotes satiety. Green peas add a boost of vitamins (A, C, K), minerals, and antioxidants. Tahini provides healthy fats and minerals like calcium, while olive oil contributes heart-healthy monounsaturated fats. Fresh lemon juice and garlic also offer their own array of health benefits. Being naturally vegan and gluten-free, it’s a fantastic option for a variety of dietary needs.
To make an oil-free version of this green pea hummus, simply omit the olive oil from the recipe. You might need to adjust the amount of cold water slightly, potentially adding a little more to achieve the desired creamy consistency. While the flavor will be a bit different due to the absence of olive oil’s richness, it will still be delicious and incredibly healthy. You can also try adding a tablespoon of water or vegetable broth instead of oil for a similar effect.
Explore More Delicious Hummus Creations
If you loved this green pea hummus, you might enjoy experimenting with other exciting hummus flavors:
- Everything Bagel Hummus
- Dill Pickle Hummus
- Sweet Potato Hummus
- Roasted Beet Hummus
- Edamame Hummus
If you’ve whipped up this delightful Green Pea Hummus or tried any other recipe from our blog, we’d love to hear from you! Share your experience by leaving a comment or rating below. Your feedback helps our community and inspires us to create more delicious content. For even more fresh and healthy recipe inspiration, be sure to follow us on Pinterest, Instagram, Tiktok, and Facebook!
Print Recipe
Green Pea Hummus Recipe
- Author: Jessica Hoffman
- Prep Time: 15 minutes
- Cook Time: 5 minutes
- Total Time: 20 minutes
- Yield: 12 servings
- Category: Appetizer
- Method: Blend
- Cuisine: American
- Diet: Vegan, Gluten-Free
Description
Green pea hummus is a delicious and vibrant twist on classic hummus, perfect for spring and summer snacking or entertaining. This easy-to-make recipe results in a smooth, creamy, and flavorful dip that is naturally gluten-free and vegan.
Ingredients
- 15 oz can of chickpeas, drained and rinsed (skins removed for extra creaminess, optional)
- 1 cup green peas (fresh or frozen, blanched if frozen)
- 1/4 cup fresh cilantro, packed
- 1 large garlic clove, peeled
- 1/3 cup tahini
- 3 tbsp extra virgin olive oil, plus more for garnish
- 3 tbsp fresh lemon juice
- 1/2 tsp sea salt (or to taste)
- 1/3 – 1/2 cup very cold water (adjust for desired consistency)
Instructions
- Prepare Chickpeas & Peas: Drain and rinse the canned chickpeas. For a truly smooth hummus, remove the skins by rubbing them in a clean towel or gently squeezing. If using frozen peas, cook them in boiling water for 3-4 minutes, then drain thoroughly.
- Combine Ingredients: Add the prepared chickpeas, peas, cilantro, garlic, tahini, olive oil, lemon juice, and salt to a food processor.
- Initial Blend: Blend the mixture for about 1 minute, stopping to scrape down the sides of the bowl as needed to ensure all ingredients are well incorporated.
- Achieve Creaminess: With the food processor running, slowly pour in the very cold water through the feed tube. Continue to blend for another 1-2 minutes until the hummus is perfectly smooth and creamy.
- Taste & Serve: Taste and adjust seasonings if necessary. Transfer to a serving bowl, drizzle with a little extra olive oil, and garnish with fresh cilantro or a few whole peas, if desired. Serve immediately or chill until ready.
Nutrition Facts (Approximate)
- Serving Size: 1/12th of recipe
- Calories: 100 kcal
- Fat: 6g
- Carbohydrates: 9g
- Fiber: 3g
- Protein: 3.5g
- *Nutritional values are estimates and may vary based on specific ingredients and preparation methods.