
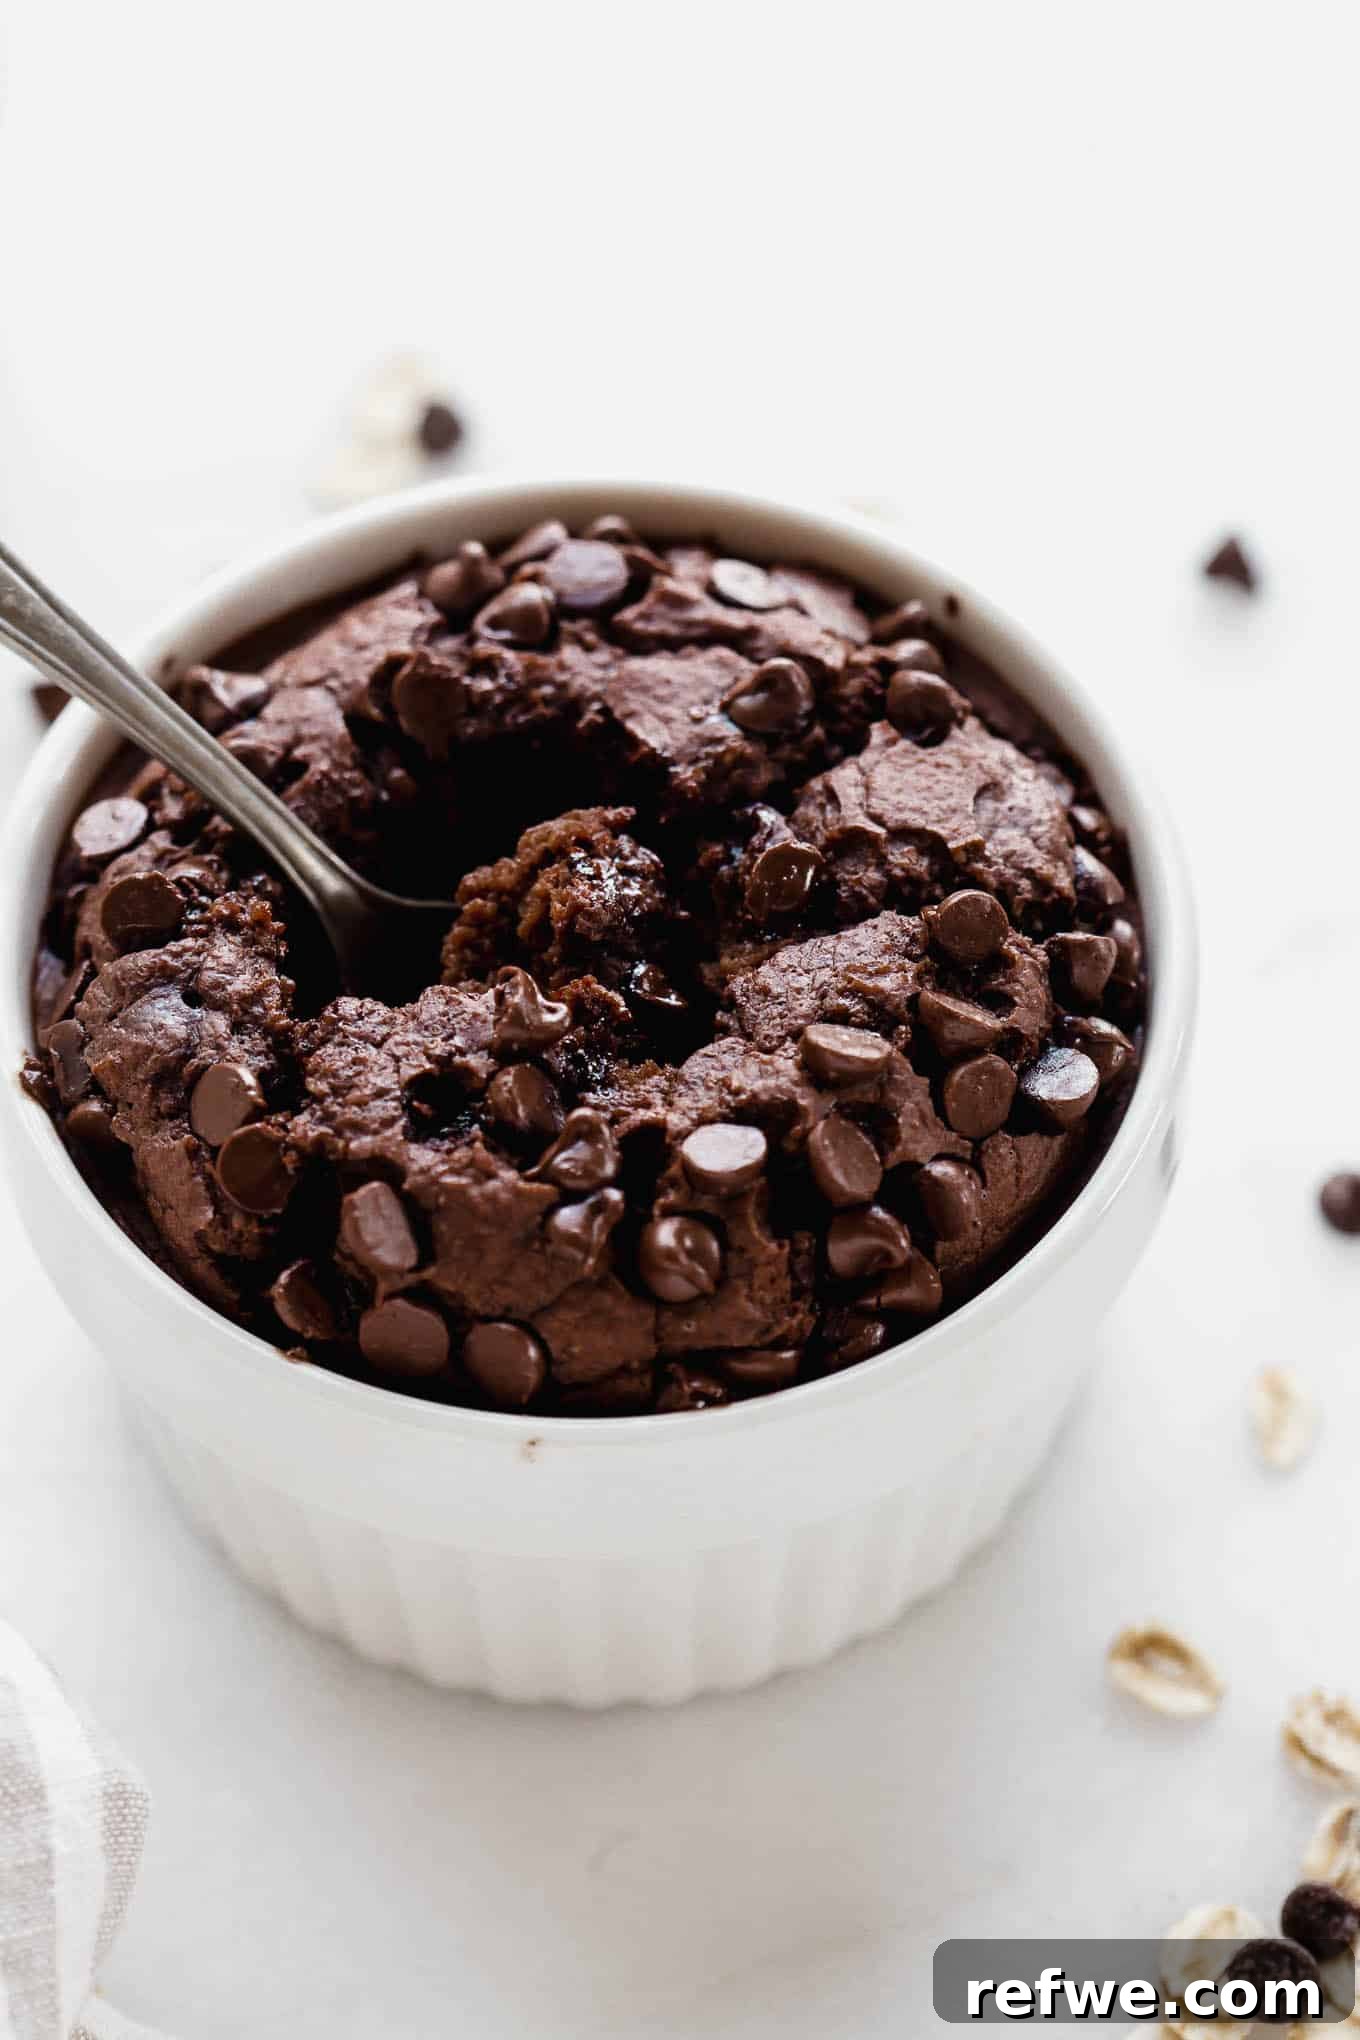
Decadent Chocolate Baked Oats: Your Healthy & Delicious Breakfast Cake
Imagine waking up to the aroma of freshly baked chocolate cake, knowing you can enjoy it guilt-free for breakfast. That dream becomes a delicious reality with these incredible Chocolate Baked Oats! This viral recipe transforms simple, wholesome oatmeal into a tender, moist, and delightfully cake-like morning meal. By blending everyday ingredients like nourishing oats, rich cocoa powder, sweet banana, and creamy almond milk, you create a breakfast experience that feels like a decadent treat but is packed with goodness. If you’re also a fan of cool and creamy oat dishes, be sure to try our refreshing Chocolate Overnight Oats for another fantastic chocolatey start to your day!
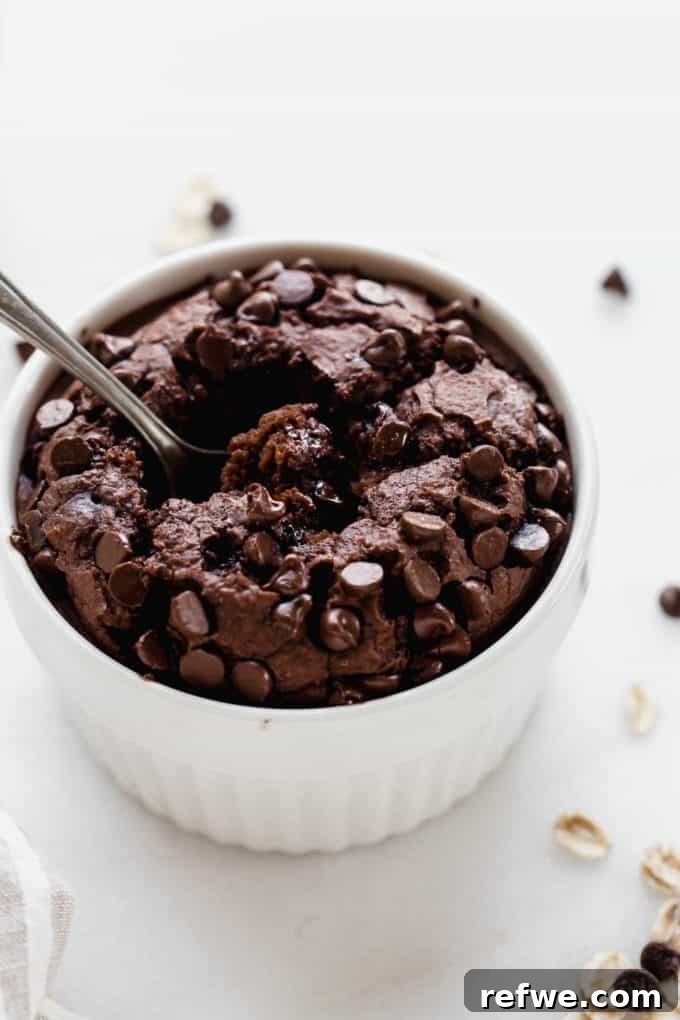
The Viral Sensation: Why Blended Baked Oats Took Over TikTok
The “baked oats” trend rapidly gained massive popularity across social media platforms, particularly on TikTok, and it’s easy to see why! While you might be familiar with traditional baked oatmeal, where whole oats are baked with various fruits and spices, blended baked oats offer a unique and irresistible twist. The key difference lies in the preparation: instead of leaving the oats whole, they are blended into a smooth, creamy batter with the other ingredients before baking. This innovative technique is what gives these oats their signature texture.
The result is a breakfast dish that boasts an incredibly soft, light, and airy consistency, remarkably similar to a freshly baked chocolate cake or a rich chocolate mug cake. This transformation from hearty grains to a fluffy, dessert-like texture is precisely why they became a viral sensation. They offer a comforting, indulgent feel without compromising on nutrition, making “cake for breakfast” a healthy and satisfying reality. These Chocolate Baked Oats rise beautifully in the oven, creating a satisfying individual portion that feels truly special.
While the blended, cake-like texture is a major draw, this recipe is also quite adaptable. If you prefer a bit more chew and texture in your oats, you can simply skip the blending step and mix all the ingredients directly in a bowl before baking. This will yield a dish closer to traditional baked oatmeal but still packed with delicious chocolate flavor. Beyond breakfast, these versatile baked oats make a fantastic protein and fiber-rich snack or even a wholesome, guilt-free dessert at any time of day.
Why You’ll Fall in Love with These Chocolate Baked Oats
This isn’t just another trending recipe; these Chocolate Baked Oats are a culinary revelation for good reason. Here’s why this recipe is sure to become a beloved staple in your breakfast rotation:
- Effortlessly Simple to Prepare: This recipe champions convenience. The entire process involves merely adding all your ingredients to a blender or food processor, blitzing until smooth, and then baking them in charming individual ramekins. It’s a quick, mess-free method that delivers a gourmet-quality breakfast with minimal effort, perfect for busy mornings. For another equally simple yet delightful breakfast, don’t forget to try our Almond Croissant Baked Oats!
- A Nutritional Powerhouse for a Great Start: Despite their dessert-like taste, these baked oats are genuinely beneficial for your health. Each generous serving provides approximately 9 grams of dietary fiber, crucial for digestive wellness and maintaining sustained feelings of fullness, and nearly 11 grams of protein, vital for muscle repair and providing long-lasting energy. It’s a breakfast that truly nourishes your body and keeps you satisfied until your next meal.
- Infinitely Customizable to Your Unique Tastes: This recipe offers a wonderfully versatile base, inviting endless experimentation. Whether you desire extra sweetness, different spices, a variety of mix-ins, or unique toppings, these chocolate baked oats can be effortlessly tailored to match your personal preferences and dietary requirements. We’ll delve into a wide array of creative variations and clever substitutions later in this article to inspire your culinary imagination.
- Perfect for Efficient Meal Prepping: These delicious oats are not only fantastic when enjoyed fresh from the oven, but they also maintain their quality beautifully for meal preparation. You can bake a batch on a Sunday, and you’ll have wholesome, ready-to-eat breakfasts for several days, significantly streamlining your morning routine and saving you valuable time and effort.
- Kid-Friendly & Universally Loved: The rich, decadent chocolate flavor combined with the appealing cake-like texture makes these baked oats a guaranteed hit with both children and adults alike. It’s an ingenious and enjoyable way to incorporate essential whole grains and fruits into a meal that even the pickiest eaters will enthusiastically devour.
- Satisfies Sweet Cravings Healthily: If you often crave something sweet in the morning but want to avoid unhealthy options, these chocolate baked oats are your answer. They perfectly satisfy that sweet tooth in a way that’s wholesome, nutritious, and keeps you feeling good.
Essential Ingredients for Your Chocolate Oat Delight
Crafting these heavenly Chocolate Baked Oats requires just a handful of simple, wholesome ingredients. Each component plays a vital role in achieving the perfect flavor and texture. Here’s a detailed look at what you’ll need, along with valuable insights and smart substitution ideas:
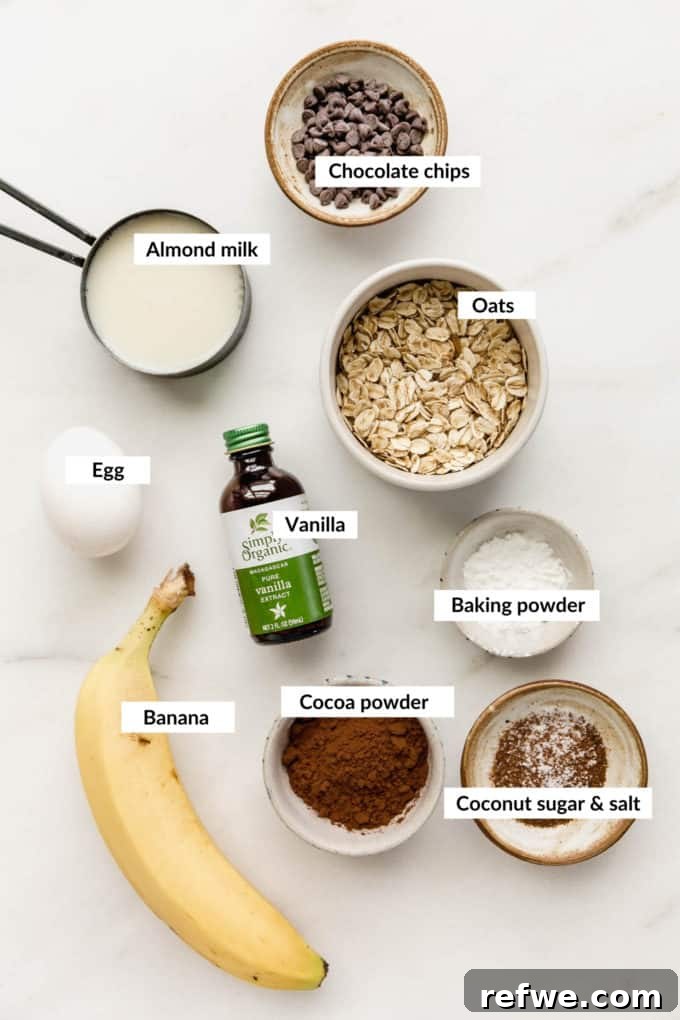
- Oats: The foundational ingredient of our recipe. You have the flexibility to use either rolled oats (also known as old-fashioned oats) or quick oats. Since the oats will be thoroughly blended into a smooth batter, the initial difference in their texture becomes negligible in the final product. For individuals with gluten sensitivities or celiac disease, ensure you choose certified gluten-free oats to maintain the integrity of a gluten-free dish. Alternatively, for an even finer, super-smooth cake-like consistency, you can opt to use oat flour, though whole oats blend perfectly well into a delightful batter.
- Cocoa Powder: This ingredient is paramount for delivering that deep, luxurious chocolate flavor. For the most intense and authentic chocolate experience, we highly recommend using a high-quality, unsweetened cocoa powder. Varieties known for their darker color and robust flavor, such as Dutch-processed cocoa powder, will yield a richer, more profound chocolate taste, reminiscent of dark chocolate. Avoid sweetened hot chocolate mixes, as they contain too much sugar and other additives.
- Baking Powder: A critical leavening agent responsible for helping your baked oats rise beautifully in the oven, achieving that desired light, airy, and fluffy cake-like texture. It’s essential to use baking powder, not baking soda, as their chemical reactions and impact on the final product differ significantly.
- Pinch of Salt: A small but mighty ingredient! Just a tiny pinch of salt is added not for saltiness, but to expertly enhance and balance all the sweet and chocolatey flavors in the recipe. It prevents the oats from tasting bland or one-dimensional, truly making the other flavors pop.
- Egg: One large egg serves as a vital binder in this recipe, helping to hold all the ingredients cohesively together. It also contributes significantly to the overall structure, moisture, and richness of the baked oats. If you’re looking to make this recipe vegan or egg-free, please consult our detailed substitution guide below for excellent alternatives.
- Ripe Banana: This ingredient is a true multi-tasker. A very ripe banana (identifiable by its abundant brown spots!) provides a wonderful source of natural sweetness, allowing you to reduce or potentially even omit any added sugars. Beyond sweetness, it adds crucial moisture, ensuring your baked oats remain tender, moist, and never dry. The riper the banana, the sweeter and more pronounced its natural flavor will be, perfectly complementing the chocolate.
- Almond Milk: Unsweetened almond milk forms the liquid base of our recipe, contributing moisture without introducing excessive calories or unwanted sugars. If you have the opportunity, homemade almond milk offers a superior, richer flavor, but any good quality store-bought unsweetened almond milk will work perfectly. Other excellent dairy-free alternatives include oat milk for an extra creamy consistency, or a small amount of full-fat coconut milk for an even more decadent texture and a subtle, tropical hint.
- Sweetener (Optional & Adjustable): Depending on the ripeness of your banana and your personal preference for sweetness, you might wish to incorporate an additional touch of sweetener. Coconut sugar or maple syrup are fantastic natural choices that harmoniously complement the chocolate and banana flavors. We recommend starting with a small amount and adjusting to your desired level of sweetness after tasting the batter (if safe to do so).
- Vanilla Extract: (Added for flavor depth) A small splash of pure vanilla extract is highly recommended. It acts as a flavor enhancer, deepening the overall sweetness and complexity of the chocolate notes, making these baked oats taste even more like a truly indulgent dessert.
- Chocolate Chips (Optional, for topping or mixing in): While entirely optional, a generous sprinkle of chocolate chips (whether dark, semi-sweet, milk, or even white chocolate) either mixed into the batter or scattered on top before baking adds an extra layer of irresistible chocolatey indulgence and a delightful textural contrast.
Step-by-Step Guide to Making Delicious Chocolate Baked Oats
Creating these delightful chocolate baked oats is surprisingly simple and incredibly rewarding. Follow these easy, step-by-step instructions to ensure a perfect, cake-like breakfast every time:
Step 1: Blend All Ingredients to Perfection
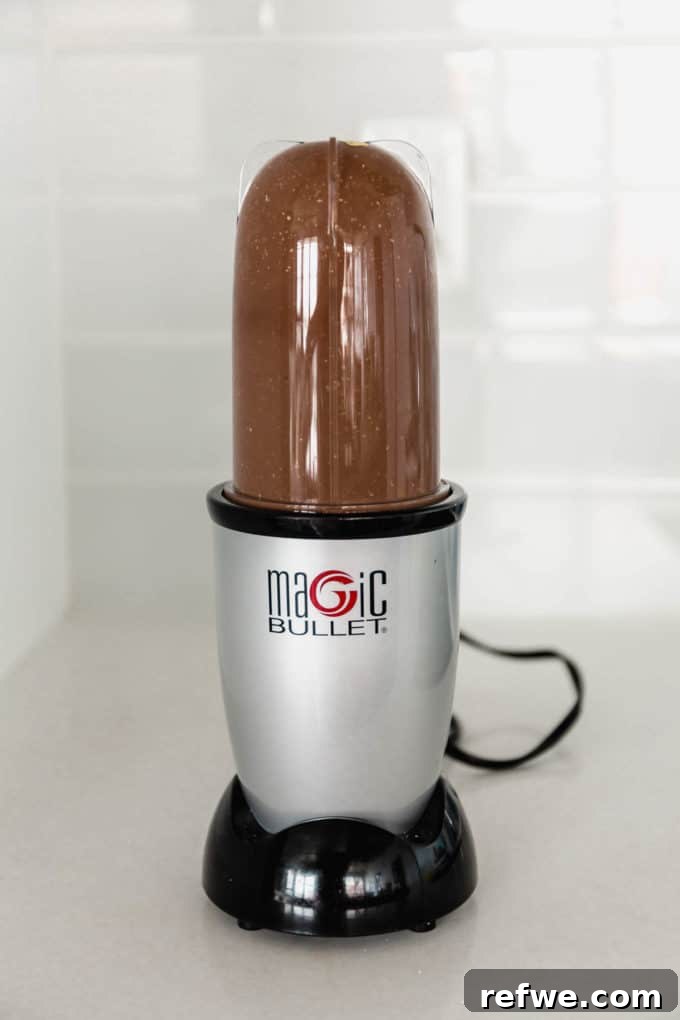
Begin by gathering all your pre-measured ingredients. Add the oats, cocoa powder, baking powder, salt, egg, ripe banana, almond milk, optional sweetener, and vanilla extract into your high-speed blender, personal blender (like a Magic Bullet or Nutribullet), or food processor. Secure the lid and blend until the mixture is completely smooth and creamy. The aim is to achieve a batter consistency that resembles a thick pancake batter or a thin cake batter, with no visible oat flakes. If you’re working with a smaller blender, it’s best to blend the ingredients in two separate batches to prevent overfilling and to ensure a uniformly smooth consistency without any chunks.

Step 2: Prepare and Fill Your Ramekins
Once your chocolate oat batter has reached a perfectly smooth consistency, prepare your baking vessels. Lightly grease two 6-ounce ramekins with a little cooking spray or butter to prevent sticking, especially if you plan to unmold them. Carefully pour the blended mixture evenly into each ramekin. It is crucial to avoid overfilling; aim to fill each ramekin no more than three-quarters of the way full. This allows ample room for the baked oats to rise significantly during baking without spilling over. For an extra touch of decadence, consider stirring a handful of chocolate chips directly into the batter before pouring, and then sprinkle a few more generously on top for a beautiful, melted finish.
Chef’s Tip for Extra Chocolate Indulgence: To maximize the chocolate experience, first mix about half of your desired chocolate chips into the blended batter. Then, pour the batter into the ramekins and sprinkle the remaining chocolate chips on top. This ensures gooey chocolate pockets throughout and a beautiful melted topping!

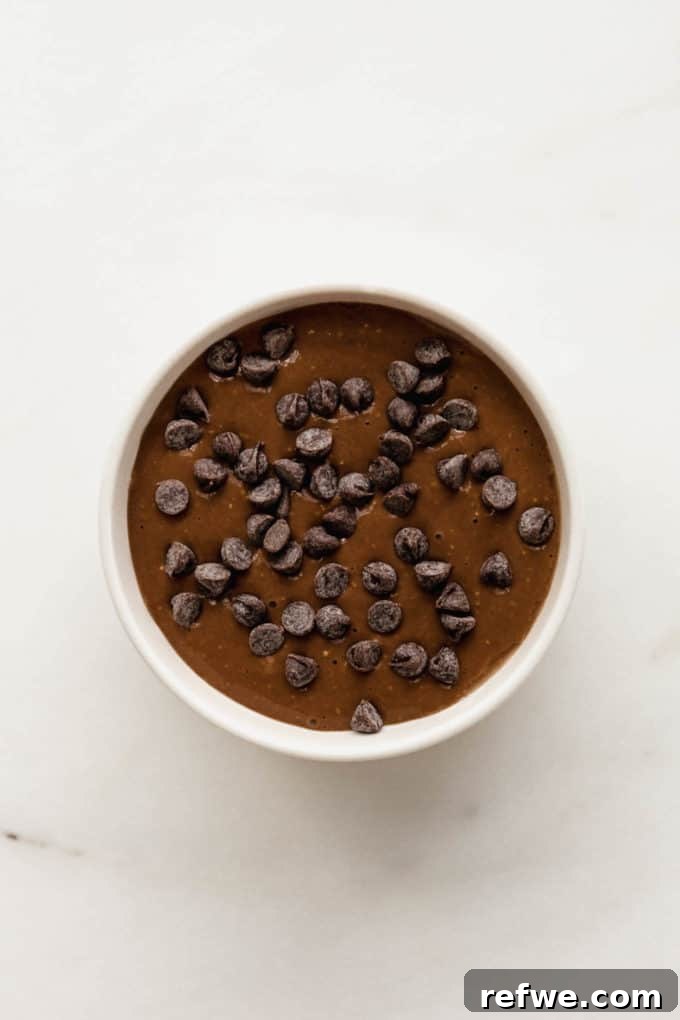
Step 3: Bake to Golden Perfection
Preheat your oven to 350 degrees Fahrenheit (175 degrees Celsius). A properly preheated oven is key for even baking and a good rise. Once your oven has reached the correct temperature, carefully place the filled ramekins onto a baking sheet (to catch any potential overflow and make transport easier) and transfer them to the hot oven. Bake for approximately 25-30 minutes. The exact cooking time may vary slightly depending on your specific oven and the size or material of your ramekins. To check for doneness, the baked oats should appear golden brown around the edges, set in the center, and a toothpick inserted into the middle should come out clean. Once baked to perfection, remove the ramekins from the oven and allow them to cool for a few minutes before handling. Remember, the ramekins will be extremely hot, so always use oven mitts or a thick kitchen towel to protect your hands!
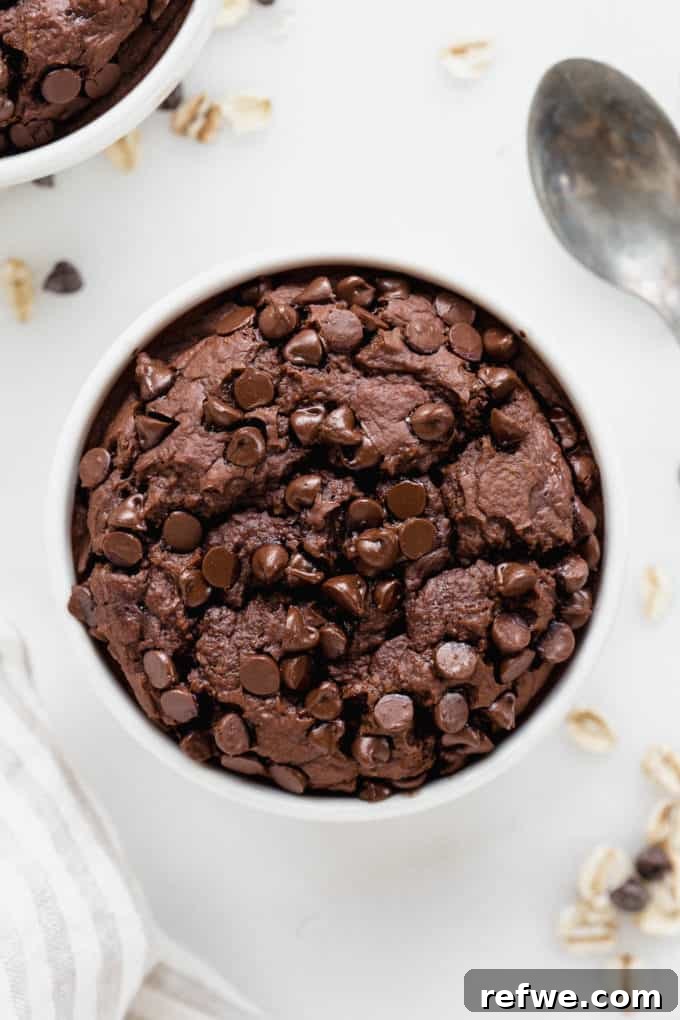
Creative Variations and Substitutions for Every Palate
One of the most appealing aspects of this Chocolate Baked Oats recipe is its incredible adaptability. It serves as a perfect canvas for culinary creativity, allowing you to easily customize it to fit specific dietary needs, accommodate ingredient availability, or simply explore new and exciting flavor combinations. Don’t be afraid to experiment and make this recipe truly your own!
- Gluten-Free Baked Oats: Achieving a gluten-free version of this recipe is remarkably simple. The primary consideration is your choice of oats; ensure you use certified gluten-free rolled oats. All other ingredients in the base recipe are naturally gluten-free or have readily available gluten-free equivalents, making this a safe and delicious option for those avoiding gluten.
- Vegan Baked Oats: To transform this recipe into a completely plant-based delight, the key is replacing the egg. The most popular method is to use a “flax egg”: simply combine 1 tablespoon of ground flaxseed with 3 tablespoons of water, stir well, and let the mixture sit for about 5 minutes until it thickens into a gel-like consistency. This flax egg can then be used as a direct, effective substitute for one chicken egg. Other viable vegan egg alternatives include chia eggs (1 tablespoon chia seeds mixed with 3 tablespoons water) or commercially available vegan egg replacers following package instructions.
- Baked Oats Without Banana: If bananas aren’t your preference or you simply don’t have one on hand, don’t worry! You have several excellent options. You can easily swap the banana for 1/3 cup of unsweetened applesauce, which provides similar moisture and natural sweetness. Alternatively, for moisture and a slightly richer texture, use 2 tablespoons of melted coconut oil and increase the amount of almond milk to 1 cup (instead of 3/4 cup) to maintain the perfect batter consistency. In both cases, you might need to adjust the amount of added sweetener slightly to match your taste.
- High-Protein Baked Oats: For those looking to significantly boost their protein intake, this recipe is perfect for modification. You can substitute 1/4 cup of the oats with 1/4 cup of your favorite protein powder. For this chocolate version, a chocolate-flavored protein powder would be an ideal and delicious complement! You could also blend in a tablespoon of natural peanut butter, almond butter, or cashew butter into the batter for an additional boost of protein and healthy fats.
- Add a Delightful, Gooey Filling: Elevate your baked oats with a surprise center! After pouring your batter halfway into the ramekin, add a generous spoonful of your favorite nut butter (such as peanut butter, almond butter, or hazelnut butter) or a square of rich dark chocolate. Then, cover with the remaining batter. As you dig into your warm baked oats, the warm, gooey filling will exquisitely ooze out, creating an irresistible and incredibly satisfying treat.
- Nut-Free Option: If you or someone you’re baking for has nut allergies, making this recipe nut-free is straightforward. Simply swap the almond milk for another plant-based milk like oat milk, soy milk, or rice milk. For fillings, avoid nut butters and instead opt for sunflower seed butter (SunButter) or a seed-based chocolate spread.
- Spice It Up: Enhance the chocolate flavor and add complexity with various spices. A pinch of cinnamon can warm the flavors beautifully, while a tiny dash of cayenne pepper introduces a subtle heat, reminiscent of Mexican hot chocolate. A hint of instant coffee granules or espresso powder can deepen the chocolate notes, creating a rich mocha-like depth without a strong coffee flavor.
- Fruity Additions: For a delightful burst of freshness and natural sweetness, consider folding a handful of fresh or frozen berries (such as raspberries, blueberries, or chopped cherries) into the batter before baking. The fruit will provide a lovely contrast to the chocolate and add extra antioxidants.
- Different Toppings for Customization: While chocolate chips are a classic, don’t limit yourself! Explore other exciting toppings like shredded coconut (toasted or untoasted), chopped nuts (walnuts, pecans, almonds) for crunch, a swirl of Greek yogurt or plant-based yogurt, a drizzle of extra maple syrup or honey, or even a dollop of whipped cream (dairy or coconut-based) for a truly indulgent dessert feel.
Pro Tips for Fluffy and Perfectly Baked Oats Every Time
Achieving that ideal cake-like texture and rich, comforting flavor in your Chocolate Baked Oats is surprisingly simple, but a few key tips can elevate your results from good to absolutely perfect:
- Don’t Overmix the Batter: After combining all the ingredients in your blender or food processor, blend just until everything is smoothly combined and no visible oat flakes remain. Resist the temptation to overmix. Overmixing can develop the gluten in the oats (even gluten-free oats can contain some compounds that react similarly), leading to a denser, chewier texture rather than the desired light and fluffy consistency. A few quick pulses are generally sufficient to create a smooth batter.
- Properly Fill Your Ramekins: As mentioned in the instructions, these blended baked oats will rise beautifully during baking. To prevent any messy overflows in your oven, it is crucial to fill your ramekins no more than three-quarters of the way full. This provides ample space for the oats to expand and ensures they achieve a lovely, domed top without spilling.
- Embrace Creative Mix-Ins and Toppings: Don’t hesitate to personalize your baked oats with additional ingredients! Consider folding in crunchy cacao nibs for an extra burst of intense chocolate flavor and texture, shredded coconut for a delightful tropical twist, or chopped nuts (like walnuts, pecans, or almonds) for added crunch, healthy fats, and a nutty aroma. These can be incorporated directly into the batter before pouring or generously sprinkled on top prior to baking.
- Always Preheat Your Oven Thoroughly: For consistent and even baking, always ensure your oven is fully preheated to the specified temperature before placing the ramekins inside. A properly preheated oven allows the baking powder to activate effectively from the start, contributing to a better rise and a uniformly cooked texture.
- Adjust Sweetness to Your Liking: The ripeness of your banana plays a significant role in the overall sweetness of the baked oats. If you’re comfortable tasting raw batter (especially if you’re using a flax egg), do so and adjust the amount of coconut sugar or maple syrup as needed to suit your personal preference.
- Lightly Grease Your Ramekins: Even with non-stick ramekins, a light greasing with cooking spray or a thin layer of butter is a good practice. This prevents any potential sticking and ensures your delicious baked oats can be easily removed and served, whether directly in the ramekin or unmolded onto a plate.
How to Store and Reheat Your Chocolate Baked Oats
These Chocolate Baked Oats are not only perfect for enjoying immediately but also make an excellent choice for meal prepping. They store beautifully and can be reheated for a quick and satisfying breakfast or snack for days to come. Here’s how to best store and reheat them:
- Refrigeration (Fridge): Once your Chocolate Baked Oats have completely cooled to room temperature, they can be stored for later enjoyment. Transfer them to an airtight container, or simply cover the ramekins tightly with plastic wrap to prevent them from drying out. They will keep fresh in the refrigerator for up to 2 days. When you’re ready to indulge, reheat them gently in the oven or microwave until they are warmed through to your liking.
- Freezing (Freezer): For longer-term storage, baked oats freeze exceptionally well. Ensure the baked oats are entirely cooled before freezing. Tightly wrap each individual ramekin (or the portion of oat if you’ve removed it from the ramekin) in several layers of plastic wrap, then place them into a large freezer-safe bag or an airtight freezer container. They can be safely frozen for up to 2 months. To reheat from frozen, it’s best to let them defrost on the kitchen counter for a few hours, or ideally, transfer them to the refrigerator overnight. Once thawed, warm them in the oven or microwave as desired.
- Reheating in the Oven: For the best results, especially if you want to regain a slightly crispy exterior and a wonderfully moist interior, reheat your baked oats in a preheated oven. Place them in an oven preheated to 300°F (150°C) for approximately 10-15 minutes, or until they are thoroughly heated through to the center.
- Reheating in the Microwave: If you’re looking for the quickest reheating method, the microwave is your friend. Place a single ramekin of baked oats in the microwave and heat for 30-60 seconds. Continue in short 15-second bursts if needed, until warm. Be cautious not to overheat, as this can sometimes cause the oats to become dry or rubbery.
Frequently Asked Questions About Chocolate Baked Oats
Yes, absolutely! Chocolate Baked Oats are indeed an excellent and healthy choice for breakfast or a satisfying snack. They are rich in complex carbohydrates from the whole oats, provide a substantial amount of dietary fiber (around 9 grams per serving), and are a good source of protein (nearly 11 grams per serving). This nutritional profile contributes significantly to prolonged satiety, stable blood sugar levels, and sustained energy throughout your morning. To enhance their health benefits even further, consider using dark chocolate chips with a high cocoa percentage (70% or more) for added antioxidants and reduced sugar content.
Absolutely! Baked oats are wonderfully convenient for meal preparation and are still delicious the next day. You can easily store them in the refrigerator overnight and simply heat them up in the oven or microwave when you’re ready to eat. A clever tip if you plan on enjoying your baked oats the following day is to slightly undercook them during the initial baking process. This subtle adjustment helps prevent them from becoming dry when you reheat them, ensuring they remain moist and delightful.
While a blender or food processor is highly recommended for achieving the signature smooth, cake-like texture that makes these baked oats so incredibly popular, it is not strictly essential. If you don’t own a blender, you can certainly make this recipe by simply mixing all the ingredients thoroughly in a bowl. This method will result in a dish that more closely resembles a traditional “baked oatmeal” style, where the oats retain more of their whole texture. It’s still incredibly delicious and a fantastic breakfast option!
While this recipe is primarily optimized for oven baking to achieve the best texture, you can certainly attempt to cook chocolate baked oats in the microwave for a quicker option. I haven’t personally tested this specific recipe in the microwave, but generally, baked oats can be microwaved successfully. If you choose this method, I highly recommend using a larger mug or a microwave-safe bowl and filling it only halfway with the batter to prevent any potential overflowing as it cooks. Start by microwaving for 1-2 minutes, then continue in 30-second intervals until the oats are cooked through and set. Be aware that the texture might be slightly different compared to oven-baked oats, but it will still offer a warm and tasty breakfast!
For this blended baked oats recipe, both rolled oats (also known as old-fashioned oats) and quick oats work exceptionally well. Since the blending process transforms them into a smooth batter, the initial difference in their textures becomes negligible in the final product. If you’re aiming for a slightly finer, even more cake-like texture, either type will blend down effectively. For individuals with gluten sensitivities or celiac disease, always opt for certified gluten-free oats to ensure the recipe remains suitable for your dietary needs.
Absolutely! This recipe is incredibly easy to scale up. You can easily double or triple the ingredients to prepare more servings. If making a larger batch, you might opt to use a small baking dish (such as an 8×8 inch pan) instead of individual ramekins. Just remember to adjust the baking time accordingly; larger quantities will require a longer cooking time. Always rely on the toothpick test—insert a toothpick into the center, and if it comes out clean, your baked oats are perfectly done!
You can certainly prepare the batter the night before and store it in an airtight container in the refrigerator. In the morning, simply give it a quick stir, pour it into your ramekins, and bake as directed. This can save you valuable time during busy mornings, allowing you to enjoy fresh-baked oats with minimal effort.
More Delicious Breakfast Recipes to Explore
If you’ve thoroughly enjoyed these delightful Chocolate Baked Oats and are looking for more healthy and delicious ways to start your day, we have an extensive collection of breakfast recipes that are sure to inspire you. Explore these other fantastic options from our kitchen:
- Protein Overnight Oats
- Peanut Butter Overnight Oats
- Healthy and Easy Banana Nut Muffins
- Quinoa Breakfast Bowl
- Coconut Flour Pancakes
- Baked Oatmeal Cups
- Cinnamon Roll Baked Oatmeal
- Blueberry Baked Oatmeal
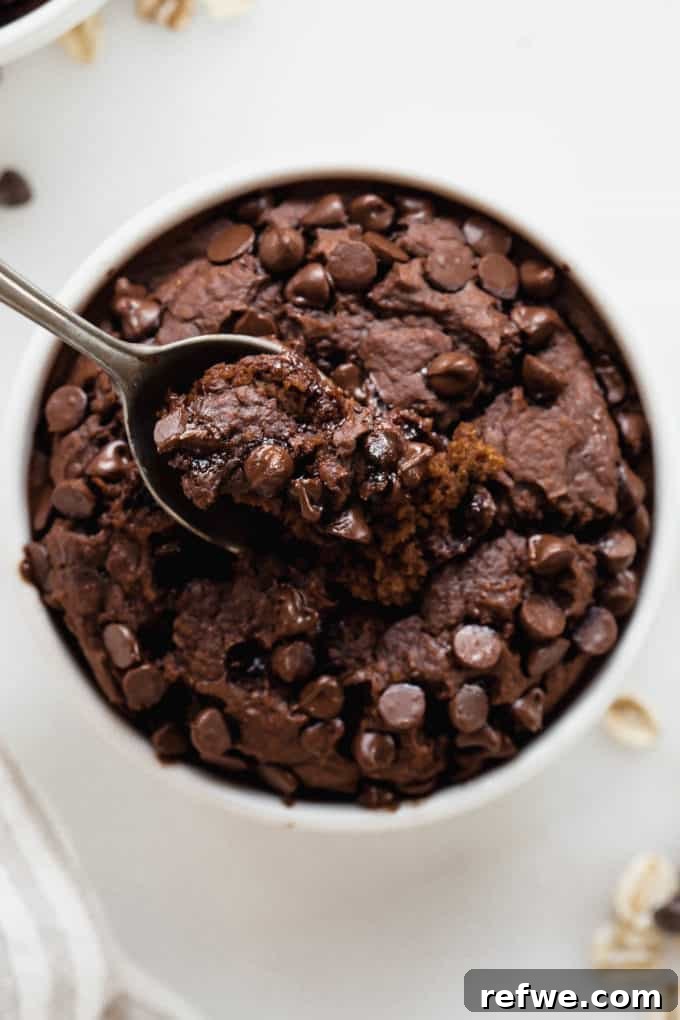
We genuinely hope you love creating and savoring these Decadent Chocolate Baked Oats! If you tried this recipe or any other delightful creation on our blog, we would be absolutely thrilled to hear about your experience. Please take a moment to leave a comment and a rating below to let us know how much you enjoyed it. Your feedback helps us grow and inspires others! Be sure to follow along with us on Pinterest, Instagram, and Facebook for even more delicious, healthy, and inspiring recipes delivered straight to your feed!
Chocolate Baked Oats Recipe
- Author: Jessica Hoffman
- Prep Time: 10 minutes
- Cook Time: 30 minutes
- Total Time: 40 minutes
- Yield: 2 servings
- Category: Breakfast
- Method: Bake
- Cuisine: American
- Diet: Vegetarian
Description
These viral Chocolate Baked Oats are incredibly easy to make and taste just like you’re eating a rich, healthy chocolate cake for breakfast!
Ingredients
- 1 cup oats (rolled or quick, use gluten-free if needed)
- 4 tbsp unsweetened cocoa powder
- 1 tsp baking powder
- Pinch of salt
- 1 large egg (see variations for vegan alternatives)
- 3/4 cup unsweetened almond milk (or other plant-based milk)
- 1 ripe banana (or 1/3 cup applesauce)
- 1 tbsp coconut sugar or maple syrup (adjust to taste)
- 1/2 tsp vanilla extract
- Optional: Chocolate chips for topping or mixing in
Instructions
- Preheat oven to 350°F (175°C). Lightly grease two 6-ounce ramekins.
- Combine oats, cocoa powder, baking powder, salt, egg, almond milk, banana, sweetener, and vanilla extract in a blender or food processor. Blend until completely smooth and creamy.
- Divide the batter evenly between the two prepared ramekins, filling each about three-quarters full. Sprinkle with chocolate chips if using.
- Bake for 25-30 minutes, or until a toothpick inserted into the center comes out clean.
- Remove from oven and let cool for a few minutes before serving warm. Enjoy!
Recipe Notes
- For Fluffier Oats: Blend just until combined to avoid overmixing.
- Prevent Overflow: Fill ramekins only 3/4 full, as the oats will rise significantly.
- Mix it Up: Experiment with additional mix-ins like cacao nibs, shredded coconut, or chopped nuts for added flavor and texture.
- Storage: Store leftovers in the fridge for up to 2 days, or freeze for up to 2 months.
Nutrition Information (per serving, approximate)
- Serving Size: 1/2 of recipe
- Calories: 329
- Sugar: 25.2g
- Fat: 6.5g
- Carbohydrates: 60g
- Fiber: 9g
- Protein: 10.8g
Nutritional values are approximate and may vary based on specific ingredients, brands, and any additions/substitutions.